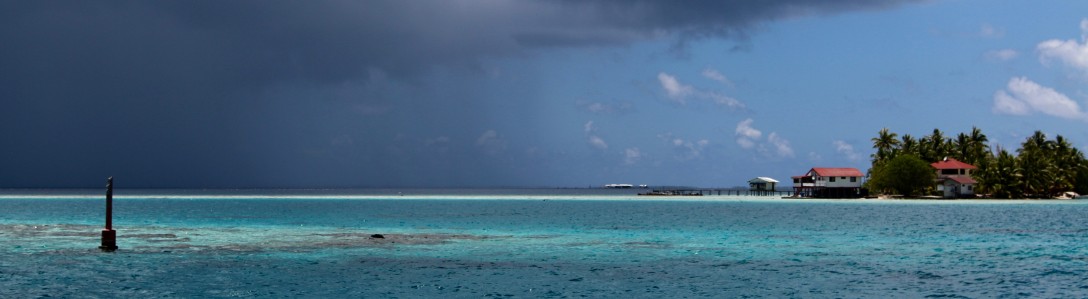
There are still pieces of equipment to install, provisions to buy, and stowage to be arranged. All of this is happening at Sea Love Boat Works in Ponce Inlet, FL. This post’s picture is of the Ponce Inlet lighthouse, which keeps watch over us as we finish preparing Starlight for the long trip ahead. 
Author: Barry
New Project

A slight change of course for this summer…
I am helping a family refit and sail this Beneteau 445. The planned voyage will take us from Daytona Beach, Florida, to New Zealand via Panama. We are aiming to arrive in New Zealand by December. We are currently refitting in Ponce Inlet, Florida, but will be underway just a couple of weeks from now. It’s shaping up to be an interesting tale, so check back from time to time…
Re-coring the Chainplate Areas–Refit Time, Part two…

What follows is a description of a repair that I did not want to get involved in… After removing the damaged parts of the hull and seeing how well-bonded everything still was, I am pretty sure that Idle Queen would have survived another circumnavigation without issues from this area if I had just replaced the chainplates and continued sailing her. But, even if I had stopped new water from getting into the hull, the water that was already inside would have continued to cause further damage by rotting the core, slowly prying the skins from the core with each freeze cycle, and causing hydraulic damage when impacts from waves against the outer skin pushed the water into new areas. Ignoring the problem would have eventually meant the end of the boat because the hull would have weakened and the required repair would have just continued to grow.


I received a lot of advice from passers-by as I was contemplating what needed to be done after I removed the chainplates and saw water draining from the resulting holes. Mostly, the suggestions were to try injecting products like epoxy, or Git-Rot into the problem area. That would have been little better than just leaving the whole thing alone, as there is no good way to remove the water without completely taking off one skin. Leaving moisture in the core leaves the original worries, and by talking to people who have made these sorts of repairs before, I learned that trying to inject anything into the area is very close to useless.
The first steps of the repair, as already mentioned in the last post, were to find the extent of the moisture penetration, and then remove the outer skin. It was tough to drill those first few holes, but once I got past that psychological hurdle, the work went quickly. I could immediately tell where the core was wet or not when the drill bit brought forth either a stream of water (from the plywood area), damp, but still solid balsa, or dry balsa dust. As an interesting aside, a moisture meter passed over the hull from the outside did not register the extent of the moisture hidden inside. The outer skin on this Dreadnought 32 is between 1/4″ and 3/8″ thick. Maybe a moisture meter works better on thinner-skinned laminates.

I taped off the edges of the area that I intended to cut out and then picked up my oscillating multi-tool (a knock-off Fein multi-master) with a metal/fiberglass blade and began to cut the outline. Work slowed down a few minutes after getting started as the glass fibers dulled the metal teeth of the blade. Partway through this step of the project, a friend loaned me a Dremel high-speed circular saw with a diamond-tipped blade. I was able to set the depth of the cut to just more than the thickness of the outer skin and zip relatively quickly along each planned cut. At this point, I was thinking that this project was going pretty well and I was only taking about as long as I planned. Of course, that meant something unexpected had to come up soon!


That problem came in the form of a good bond between the balsa and the skins. I had built model airplanes when I was a teenager and was pretty familiar with the soft, easily-cut wood from hours of shaping it into wings and fuselages. I hadn’t expected that it would be difficult to get the outer skin off, and actually had visions of popping it off intact and re-using it. Ha! An hour after I began trying to pry the outer skin off one side of the hull it was totally obvious that the balsa core was going to force me not only to destroy the outer skin, but also spend a couple of days doing it. I began with a hammer and a very large screwdriver but only succeeded in tearing the outer laminations of the skin off. Lots of mat remained stubbornly glued to the balsa. After experiments that involved using every prying tool I had access to, including an air-powered chisel, the method I settled on was to cut the skin into two-inch square chunks and then pop each one of the little squares off. That meant a lot of lines to cut! I am amazed at how well the diamond-tipped blade held up, but towards the end it was more burning through the fiberglass instead of cutting…

Once the skin was removed, I had to chisel all the rest of the core material out. This was complicated, again, by the excellent bond between the fiberglass skin and the balsa wood, and also by the fact that the plywood part of the core extended beyond my cut-out area. It was very effective (and dusty) to take a high-speed grinder and 24-grit sanding discs to remove the balsa. A sharp chisel also did the job, but was slower and I had to be careful not to go into the inner skin. The plywood was a pain because I wanted to remove it from between the skins at the upper edge of the repair. I didn’t cut the outer skin all the way to the rubrail (which is un-cored) because that wouldn’t have left enough room to get a 12-1 taper for a strong repair of the outer skin. I slowly cut it out with the oscillating multi-tool.

Once that was finished, it was simple to finish grinding a 12-1 bevel into the surrounding outer skin, and finish grinding all of the inner skin with 36-grit in preparation for bedding in new core material, which is 1/2″ end-grain balsa. Instead of putting plywood back where it had existed before, I built the area up with layers of “1708”, which is a biaxial, non-woven fiberglass material which consists of two layers of continuous fiberglass strands (weighing 17 ounces per square yard) running 45 degrees each side of vertical (biaxial) stitched to a layer of 8 ounce mat. Layers of this material were laminated until the surface was level with the surrounding area where balsa was to be placed. The balsa was cut to fit the repair area, and then bedded in a thick mash of resin, chopped strand, milled fibers, and fumed silica (Cabosil).

Next order of business was to cut plastic to use as a “bag” to hold the balsa in place. I put an old through-hull mushroom in the middle of it. The through-hull was scored so it could suck air in even if flat against a surface. Once everything was cut to fit, and the filler mixed, I rolled resin onto the balsa to saturate it. It took a few heavy coats before it stopped sucking resin in like a sponge. I catalyzed the thickened mash mixture and spread it over the whole area with a heavily v-notched spreader, working quickly. The balsa was all pushed into place until mash squeezed out around all the edges. The ”bag” was taped over the area and a shop-vac used to apply pressure to the area. This does not apply the same pressure as a specialized high-vacuum pump, but it still applies a lot of force to hold the core tightly against the inner skin while the mash cures. It applied more pressure than I could by hand, as more mash squeezed out from behind the balsa.

After the core had cured in place, all of the scores in the balsa were filled with thickened resin. This prevents water migration in case there is ever a break in one of the skins. The balsa was cut out where the chainplates mount so they mount over solid glass. Then, all of the new balsa core was sealed with resin until it stopped soaking it in. Additional ayers of 1708 cloth were built up to make up for the difference of thickness between the core and where plywood had been used originally. There are as many as 15 layers of 1708 in the area of the chainplates.

I made templates of the repair area and used them to cut layers of 1708 biaxial mat for the new outer skin. Using a 3/8″ nap roller, I wet the area with resin and saturated the glass. Each layer was carefully laid in place and the extra resin squeezed out with a fiberglass laminating, or consolidating roller. It was hot work, with the sun making sure that I was soaked no more than 10 minutes after beginning work each day. After the final layer of 1708 was laminated, I covered the whole repair with a layer of “peel ply”, which is basically a fabric like nylon coat liner that doesn’t stick to the surface. When removed, it provides a fresh, textured surface that is perfect for adding more laminations, or fairing material. Saturated with resin, and then painted, it protected the repair areas while I went away for the summer to work.
To be continued…
Refit Time! Part One…

Idle Queen is currently hauled out of the water at Deaton Yacht Service in Oriental, NC, for a major refit that will include work on the rigging, hull, and many of the systems.
The major goal of this refit is to make sure that the hull and rigging are in good condition. It has been a while since Idle Queen last had a major refit, so there are quite a few jobs to catch up on.
The thing that worried me the most during last year’s sailing was the rig. The chainplates were showing plenty of signs of corrosion, leaving rust streaks down the hull. They were leaking inside the boat, so water was definitely making its way past the fasteners. What I discovered after removing them was worse than I had expected. The hull’s core had not been sealed where the bolts fastened the chainplates to the sides of the boat, and over the years it had absorbed water leaking past the sealant. When I pulled the bolts out, water began draining from the open holes. I immediately knew that wasn’t a good sign, but when it was still leaking a couple of days later, I knew that I was going to be in for more than just making new chainplates.
I first had to find the extent of the saturation, so I started by scraping out around the holes as best I could. The scraping brought forth more foul-smelling water. At least the core wasn’t mushy. Rather, it still felt solid and fibrous even though it was saturated and dark-colored. I thought about trying to make a repair from inside, but there was no way I could stay on the boat while doing major interior fiberglass work, and I would have had to demolish the interior from the main bulkhead to the galley to access the problem area, so I decided to attack it from outside. If I’d had a place to stay and somewhere to offload all my gear from the boat, it might have been easier to have removed the inner skin to repair the core, even considering the demolition and reconstruction of all the shelves, etc.
So, I started drilling from the outside. Each new hole was made a few inches farther from the chainplate area until I hit dry core in all directions. Water poured out of some of the holes like I had drilled into the bottom of a bucket. In the end, I had a repair area of about 6 feet by 3 feet on each side of the boat.
I hated to do it, but the only way to get a good repair was to cut off the outer skin, remove all of the wet balsa and plywood, and then rebuild the area with new core and glass. So, I committed myself by cutting the outline of the repair area and beginning to pry off the outer skin. I thought this part would be pretty easy, but I was amazed at how tenaciously the balsa was bonded to the skins! I couldn’t remove the outer skin without destroying it; I had to resort to cutting it off in little pieces only a few inches square. Even using an air-powered chisel did little to make the job go faster–the balsa just absorbed almost all the energy imparted by the tool. This process made me feel a lot better about balsa-cored construction, that’s for sure. It was truly difficult take this part of the boat apart! Where there was plywood core I was able to remove the outer skin with relatively little effort.
More to come soon…
Thoughts on Dreadnought 32 Performance

When trying to compare the speed of different boats objectively, I like to use PHRF ratings to give a good idea of the actual performance differences involved. PHRF ratings are used to handicap all sorts of different sailboats so they can race together on the same course. They give a number which equates to seconds per mile, that is applied to a boat’s finishing time to determine overall performance in the race. If a boat has a lower number, it “gives” seconds to a boat with a higher number. Thus, a boat with a rating of 200 is expected to finish a one mile course 50 seconds faster than a boat rated 250. The lower-rated boat has to “give” 50 seconds to the higher-rated, slower boat when computing corrected times at the finish. So, if the boat rating 200 finishes the course 51 seconds ahead of the boat rating 250, it has won the race, but if it finishes, say, 48 seconds ahead, then it has lost on “corrected time”. The ratings are frequently adjusted to keep different boats on par. Racers are a competitive bunch, and this is a widely accepted system used for many different types of sailboat races, so I think it is a pretty good way to compare the speeds of different boats.
Just for comparison’s sake, let’s look at a Westsail 32, which rates 222, or 222 seconds per mile slower on average than a boat that rates 0. How do some other designs compare? The Crealock 34, which is a design that is held in quite high regard by many cruising sailors, rates 201. That’s only 21 seconds per mile faster, on average… How about a Contessa 32, another classic design that has a reputation for being weatherly and fast in a wide range of conditions? The Contessa 32 rates 180, or 42 seconds/mile faster than the Westsail 32. Over a 100 mile course, with both boats racing, the Contessa would be expected to finish 70 minutes faster. Over a 2,000 mile course–a huge distance: 23.3 hours. That’s a 1 day difference on a 2,000 mile crossing between a boat that has a reputation for being a slug and one that was designed as a racer/cruiser has a reputation for being quite fast in all sorts of conditions. The only PHRF rating I can find for the Dreadnought 32 is listed in San Francisco. There are not enough Dreadnought 32’s racing on the east coast to give the design a rating. The Dreadnought 32 PHRF rating is 222–same as the Westsail 32.
The PHRF ratings provide the most accurate speed comparison when there is a mix of different points of sail. If the above example citing the Westsail 32 and Contessa 32 were sailed all upwind, I would expect the Contessa to easily out-sail the Westsail every time. However, if the passage were mostly reaching or running (fair winds), the differences will be smaller. Cruising sailors prefer to plan passages that take advantage of fair winds so the actual differences may be smaller than the ratings suggest when that is taken into account.
In races, the finishing time differences normally stretch out to more than in the example above because of differences in decisions made by the crew. A poorly sailed Contessa 32 could easily finish a 2,000 mile course more than a day behind one that was sailed by a top crew. A similar time difference is possible due to poor sails. A difference in the duration of a passage is as likely to be caused by local weather, a meander in an ocean current, crew decisions, boat condition (how clean the bottom is, especially), sails, etc., as the actual speed potential of the boat being sailed.
The PHRF list I use is available at: http://www.phrfne.org/page/handicapping/base_handicaps Not every boat in the world will be there, as there has to be enough of them being raced to get accurate rating data. Still, you can get a pretty good idea of the relative speeds of a lot of different boats in real-world conditions. The system is not perfect, and each boat design has conditions where it will often out-sail it’s rating, but this data has been gathered over many years of racing in varied conditions and is frequently updated when it becomes apparent that a particular boat design (or even a particular boat) has an unfair advantage due to rating.
I hope the above gives enough information to at least keep the actual speed differences in perspective. It is impossible to consider take every factor into account when trying to compare boats, but some details will make a big difference. If you’re sailing in small, very protected waters in mostly light winds, the differences between a very heavy boat and a lighter one will be exaggerated, for instance.
In real life, I have found that my Dreadnought 32 is surprisingly easy to drive on most points of sail at speeds that keep me happy (4-6.5 knots) with very little strain on the rigging. My running average speed over the last 2,000 miles is about 4 knots (per GPS log), but I have sailed the boat overly conservatively due to suspect rigging (which I am in the process of changing). That average includes a mix of offshore and ICW miles, many miles of me being lazy and not hauling out bigger sails on light-wind days, sailing reefed down when being conservative at night, and the like. It also includes motoring, where I run my boat slower than many people partly because I only have 15 hp in a 20,000 lb boat, and partly because I actually enjoy just tooling along slowly when under power… My average speed under power is a relaxed 4-4.5 knots, even though Idle Queen will power at 6.5 knots when needed.
Away at Sea
Just a quick note to say that I will not be able to reply to comments, etc. until about the end of August… There will be some updates here soon, mostly about project work and plans for the next sail. Thanks for stopping by!
Up and Running Again
For anyone who visited this site between July 17 and now, I have to apologize for the error message that you likely encountered. This unfortunate downtime was caused by a security hole in the software that I use to send out emails when there is a new post. Thanks to one of my readers for alerting me of the problem by email. For anyone who uses WordPress, I encourage you to read more about the security hole that caused this problem at http://blog.sucuri.net/2014/07/remote-file-upload-vulnerability-on-mailpoet-wysija-newsletters.html. Almost 2 million sites were affected by this problem.
Fortunately, the bot or person who tried to alter this site had some syntax errors in their code, so the worst that happened seems to have been that an error message was generated and the site did not display. The site has now been thoroughly scanned, and I took the additional step of removing every file that had a change log more recent than my last update. If you notice anything on this site that now does not work, please let me know using the contact form. Thanks!
How to Build a Dreadnought 32
I have just added a new page to the site with the original instructions that the factory included with the Dreadnought 32 hull. It runs to all of 11 pages, and is an interesting read, not only as far as the techniques involved, but also as an example of late 1970’s homegrown technical writing.
Idle Queen was finished by Harry Heckel, Jr. from a bare hull and deck, which he bought pre-joined from the factory. It took Harry 9 months to go from a newly-delivered hull to launching.
The new page is here.
Video of Last Fall’s Trip South
From mid-November to mid-December of 2013, Idle Queen was underway traveling between Cape Cod and North Carolina. Below is a video compilation from that trip. I now have a waterproof housing for my camera after missing lots of good action due to bad weather on that trip. I look forward to being able to film in all conditions this season.
Click here to watch the video on YouTube in a new window.
In Memory of Harry Lightner Heckel, Jr.

Below is a copy of Harry’s obituary. He was an inspiration to many; including me. May he rest in peace.
“Home is the sailor, home from the sea…Harry L. Heckel, Jr., died peacefully at home after a short illness February 7, ten days before his 98th birthday. He is preceded in death by his parents, Florence Matilda Williams and Harry Lightner Heckel. Harry was born February 17, 1916, in Los Angeles, CA. After earning a Ph.D. in chemistry from UC Berkeley, Harry began his 30-year career with Allied Chemical (now Honeywell) in Syracuse, NY in 1941 as a research chemist. He became director of Allied Chemical’s Nitrogen Division Research Lab in Hopewell, VA, prior to working out of Morristown, NJ, as Director of Five Year Planning. An avid boater and former Commodore of the Hopewell Yacht Club, Harry turned his love of sailing into his greatest achievement. After retirement, Harry and his wife Faith (Faido) Irene Smith Heckel moved onto their sailboat and sailed extensively. Two years later Harry took a 32-foot Dreadnought hull, rigged her, and designed and finished the interior to create the Idle Queen. After Faido’s death in 1989, Harry kept sailing. At the age of 78 he completed his first solo circumnavigation. He completed his second solo circumnavigation at the age of 89. In 2007 Harry received the Joshua Slocum Society International’s Golden Circle award in recognition of this feat. Harry’s travel memoir, Around the World in 80 Years—The Oldest Man to Sail Alone Around the World—Twice! was published last year. Harry is survived by sons Harry L. Heckel III and Carl B. Heckel (Dixie) of Mechanicsville; daughters Florence H. Russell (Mike) of Cleveland, Ohio, and Faith H. Wagner (Richard) of Midlothian; siblings Florence Mary LaRiviere of Palo Alto, CA, and John W. Heckel (Catherine) of Friday Harbor, WA; 9 grandchildren, 20 great-grandchildren, and many longtime friends. In lieu of flowers, the family suggests donations to the American Diabetes Association or the American Red Cross. In remembrance of Harry, you may wish to read his book. A memorial service is being planned.”